 aicentos
Quickstart
Get connected in three steps: register an account → create an API key → enter the Base URL and key in your client
Last updated:
Get connected in three steps: register an account → create an API key → enter the Base URL and key in your client.
Step 1: Register an account
Open aicentos.com and click Get Started in the top-right corner to go to the sign-up page:
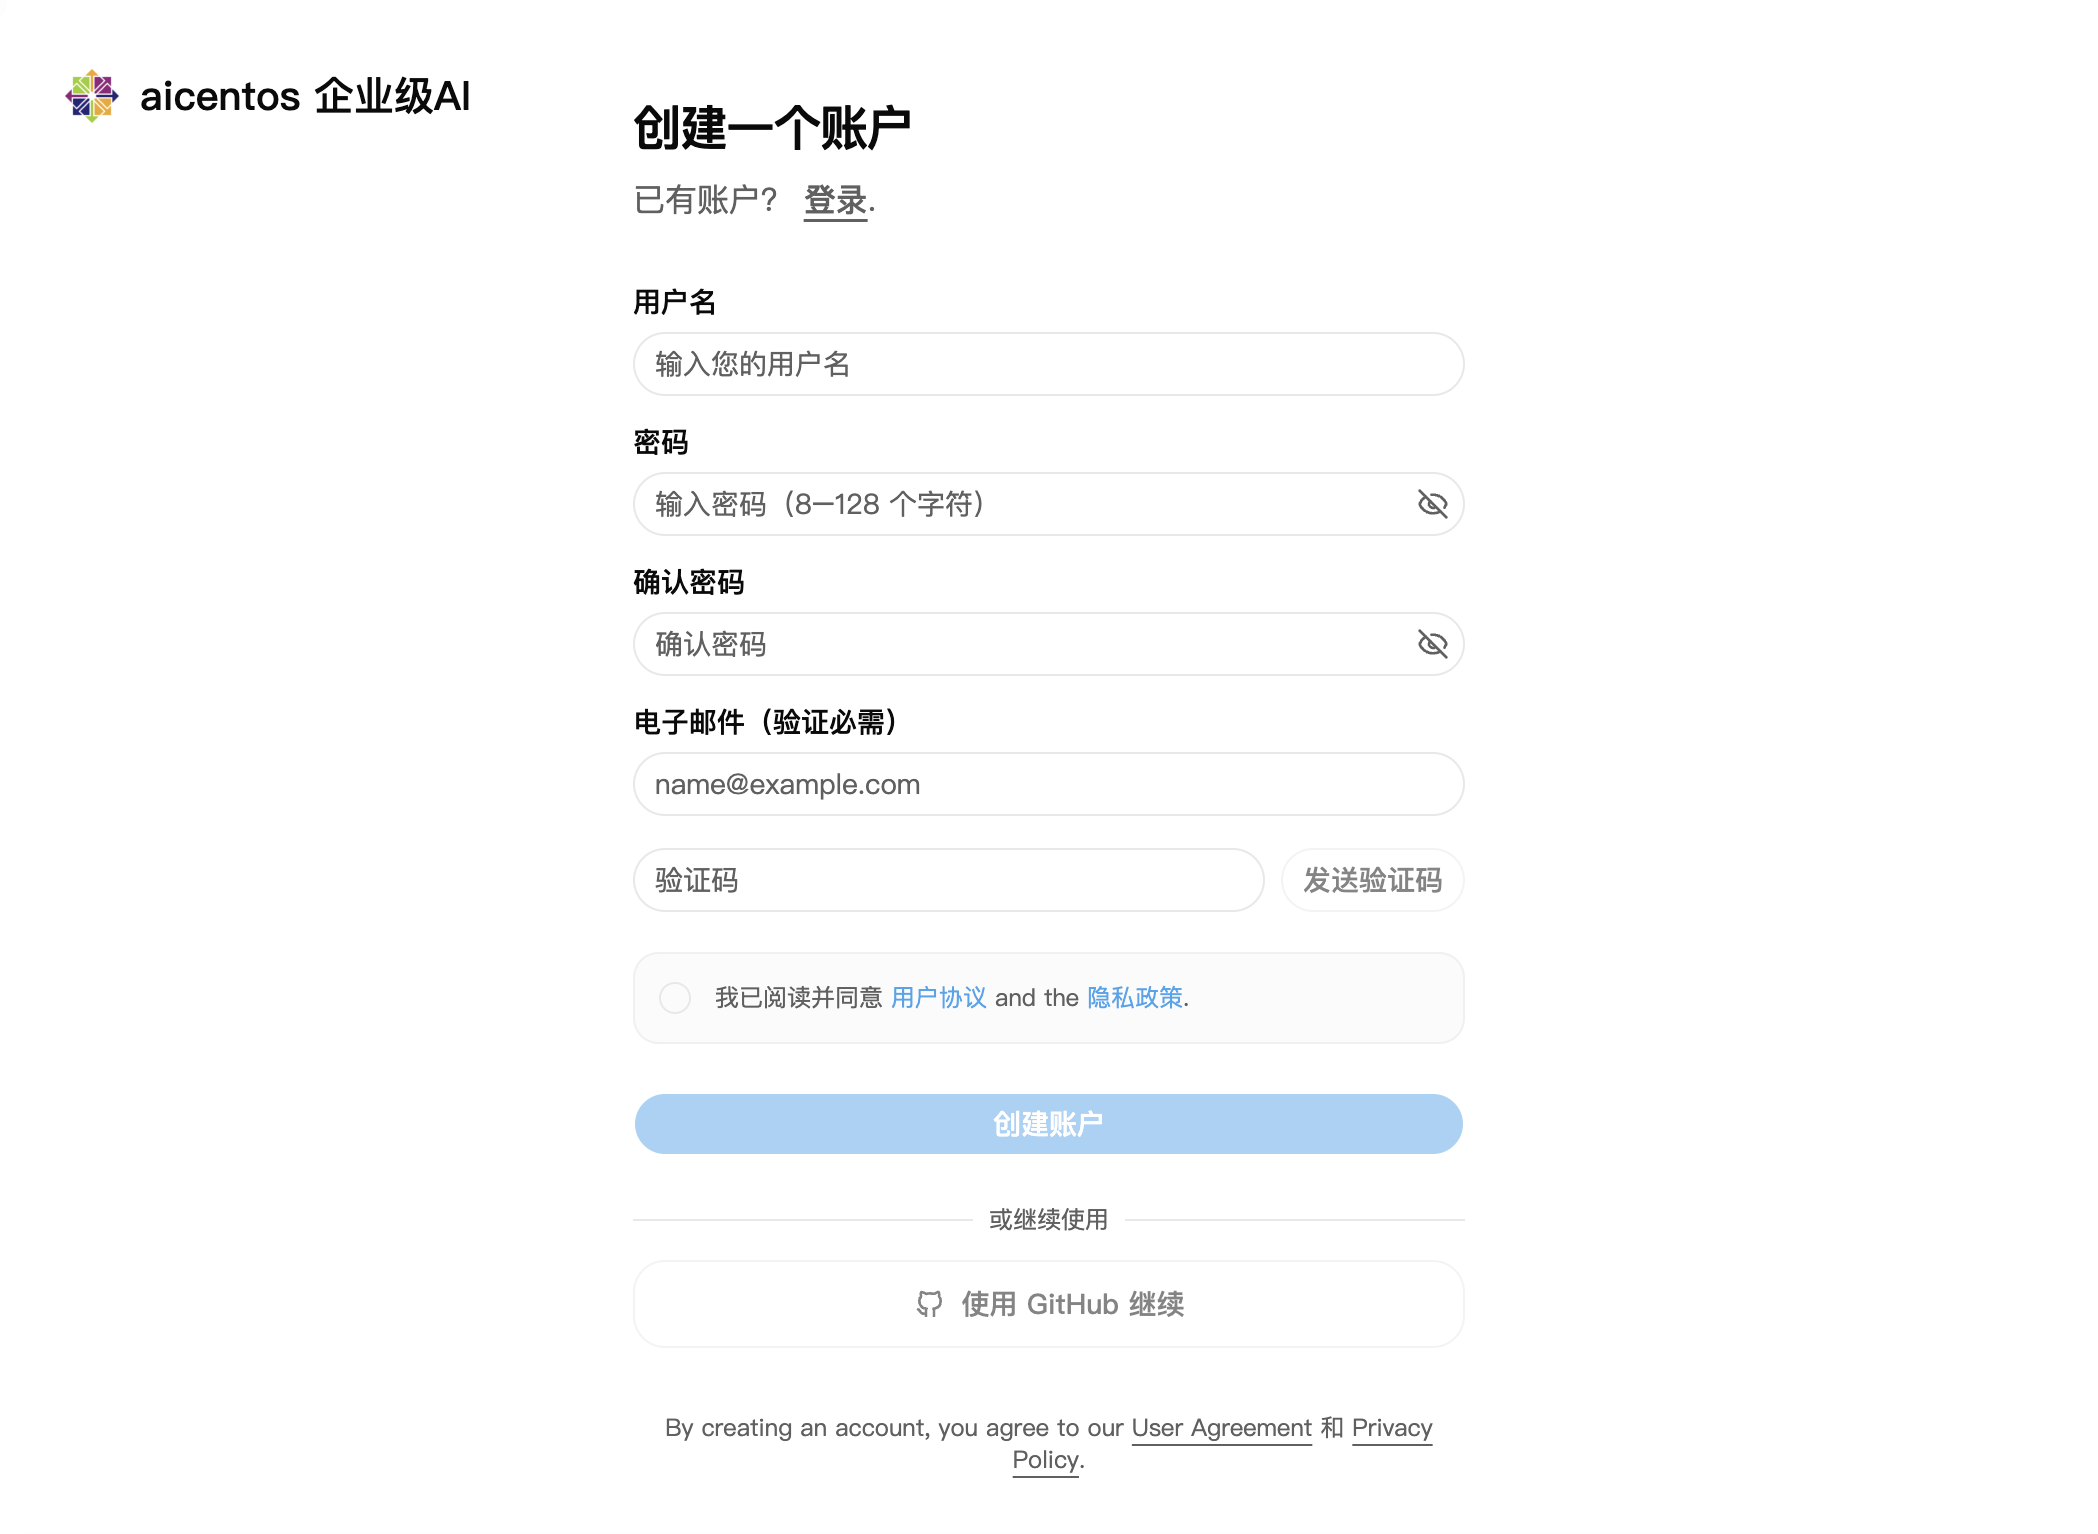
Fill in a username and password, agree to the terms of service, then click Create Account. Every new account comes with ¥1 in free credit — start calling the API without topping up first.
Step 2: Create an API key
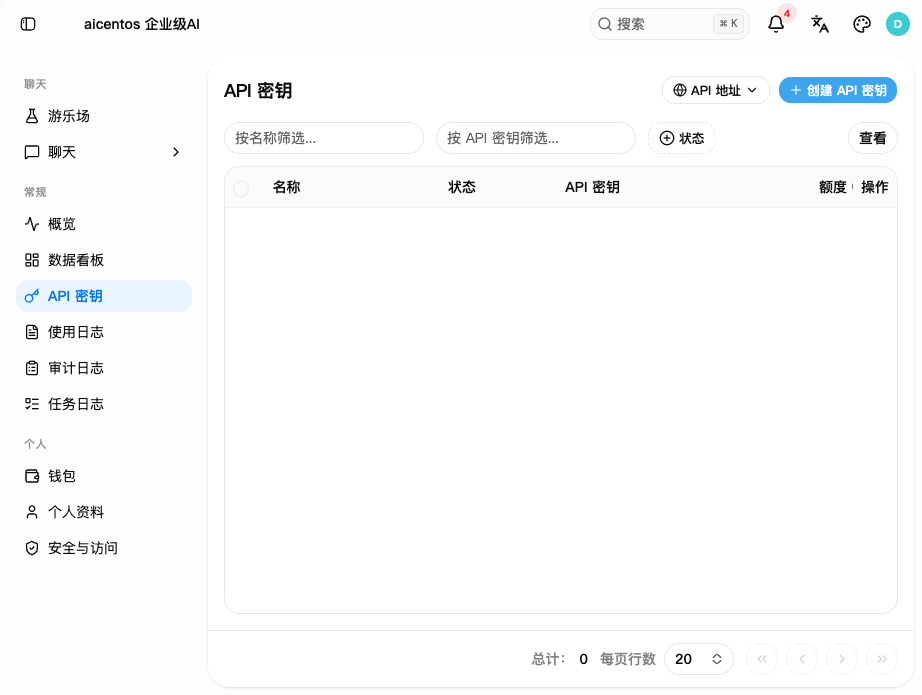
After signing in, open the console, click API Keys in the left sidebar, then click Create API Key in the top-right corner:
Fill in the settings in the dialog and click Save Changes:
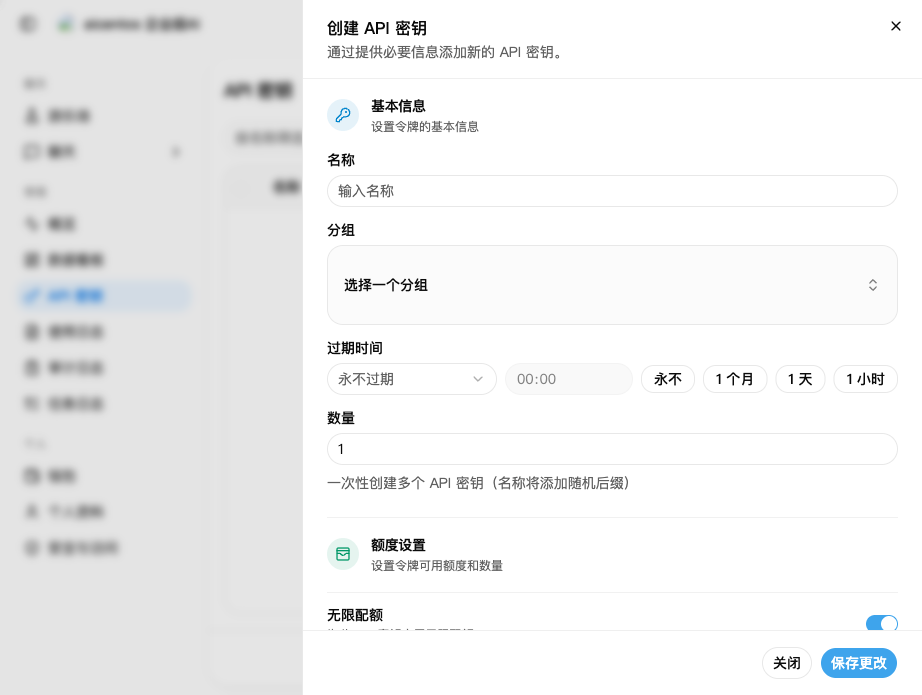
| Field | Description |
|---|---|
| Name | A custom name to tell projects apart. Create one per use case for easier cost tracking and permission revocation |
| Group | Choose which upstream group to route through; leave empty for the default |
| Expiry | "Never expires" or a fixed 1 hour / 1 day / 1 month |
| Quantity | Create multiple keys at once; a random suffix is appended to each name |
| Unlimited quota | Turn off to set a quota cap for this key |
Once created, the key appears in the list as sk-xxxxxxxxxxxx, masked by default:
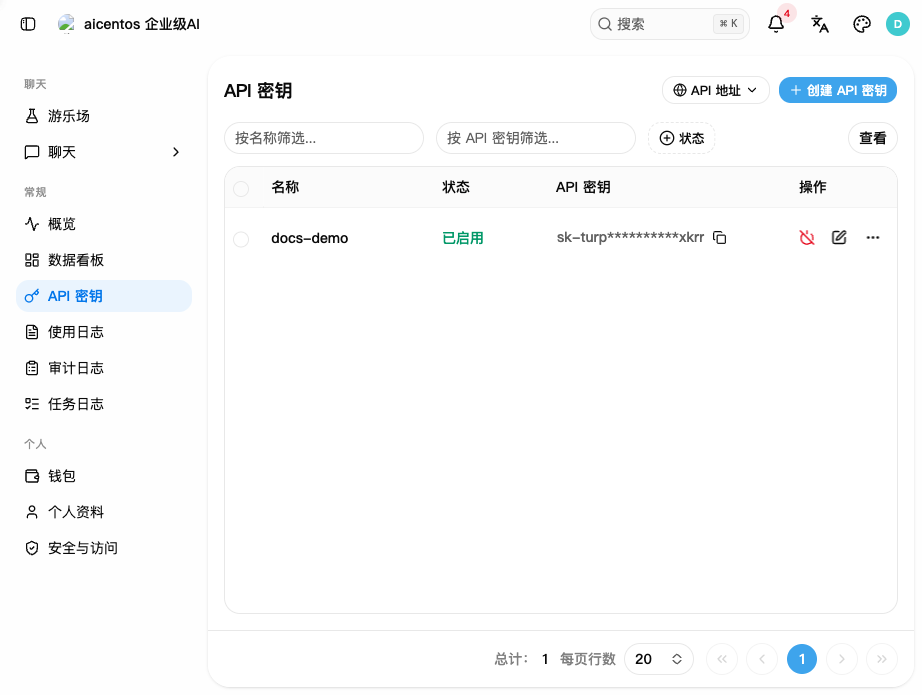
The key list supports search by name and key, and shows the group, quota, allowed models, IP restrictions and more. Keys can be edited or deleted at any time:
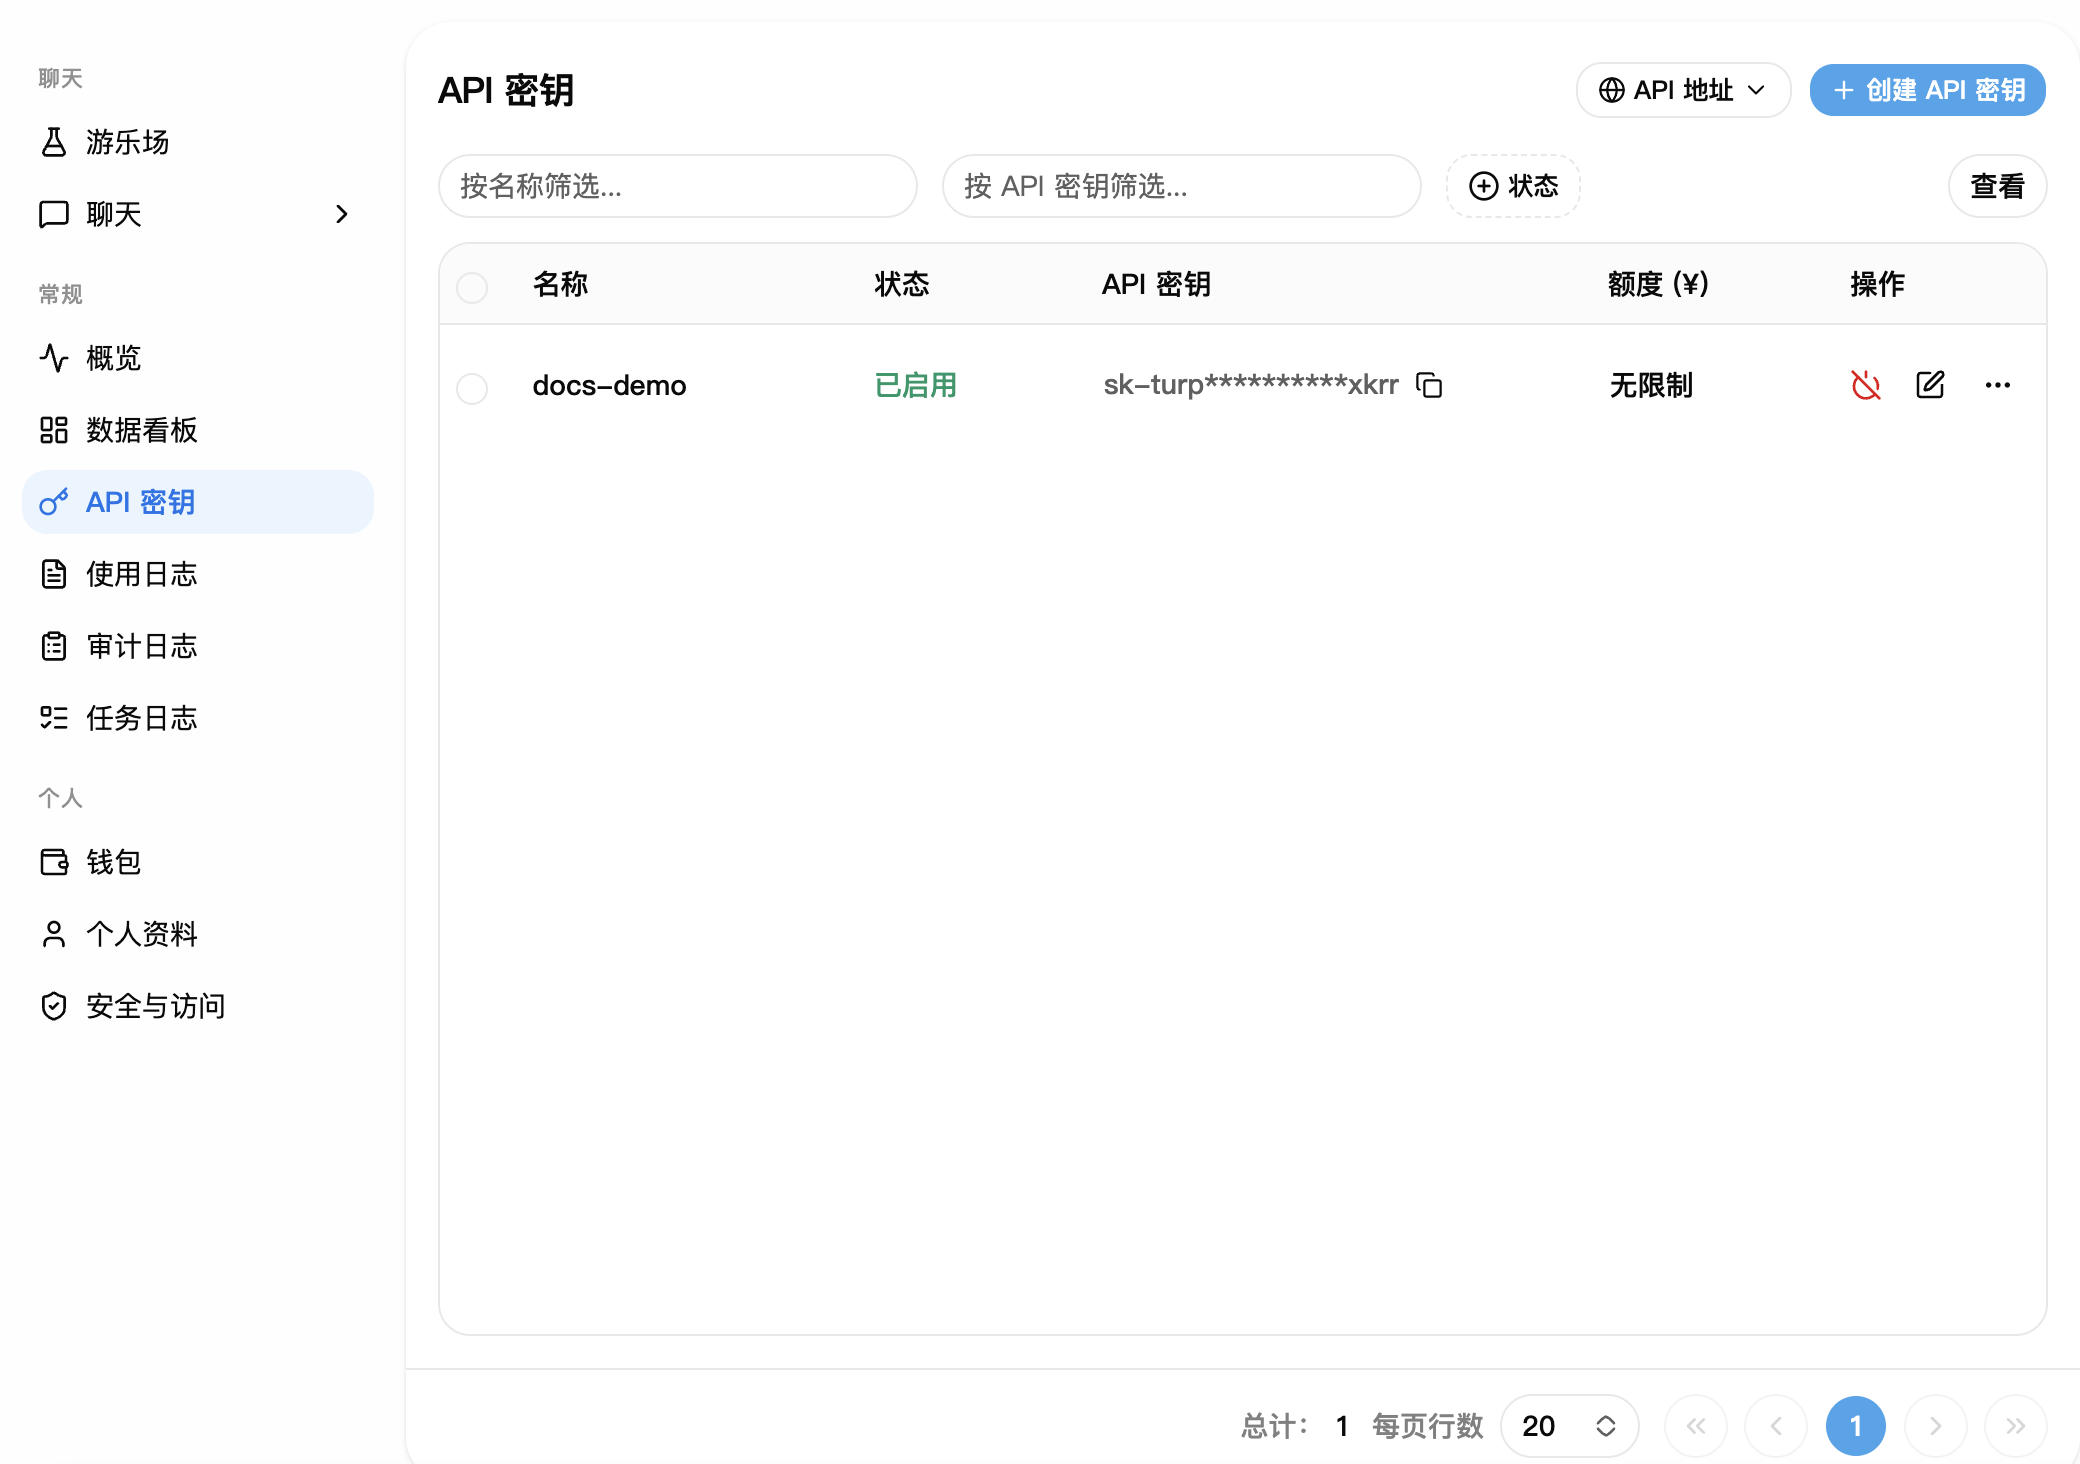
The key is shown in full only once, at creation. Copy and store it right away. Never hard-code it into frontend code or commit it to a public repository.
Step 3: Enter the Base URL and key in your client
Pick the right Base URL first
This is the step where mistakes happen most — different protocols use different addresses:
| Use case | Base URL |
|---|---|
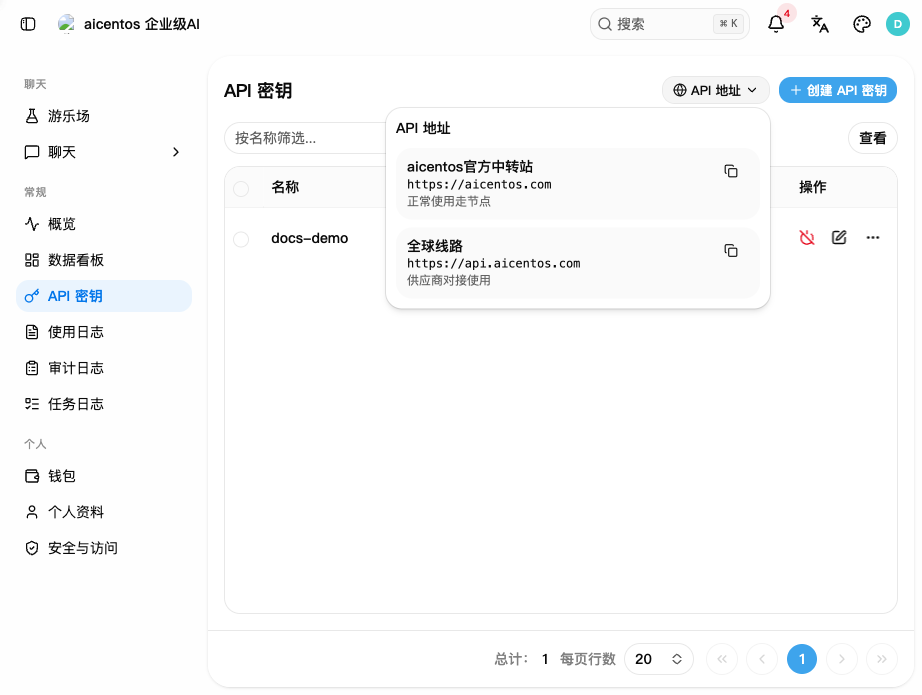
| Codex / OpenAI-compatible format | https://aicentos.com/v1 |
| Claude Code / Anthropic format, and other clients | https://aicentos.com |
For the Anthropic protocol, enter the root address only. Do not append
/v1/messagesmanually — the client adds it automatically.
You can also look up and copy addresses from the API Address dropdown at the top right of the console's API Keys page:
Verify connectivity
Run a minimal request with curl to confirm the key and network work:
export AICENTOS_API_KEY="sk-your-API-Key"

curl https://aicentos.com/v1/chat/completions \
  -H "Content-Type: application/json" \
  -H "Authorization: Bearer $AICENTOS_API_KEY" \
  -d '{
    "model": "gemini-3.8-flash",
    "messages": [
      {"role": "user", "content": "Introduce yourself in one sentence"}
    ]
  }'
You can also request the model list first. If it returns JSON, both the key and the Base URL are working:
export AICENTOS_API_KEY="sk-your-API-Key"

curl https://aicentos.com/v1/models \
  -H "Authorization: Bearer $AICENTOS_API_KEY"
Python (OpenAI SDK)
import os
from openai import OpenAI

client = OpenAI(
    api_key=os.environ["AICENTOS_API_KEY"],
    base_url="https://aicentos.com/v1",
)

resp = client.chat.completions.create(
    model="gemini-3.8-flash",
    messages=[{"role": "user", "content": "Introduce yourself in one sentence"}],
)
print(resp.choices[0].message.content)
Node.js (OpenAI SDK)
The example uses ESM syntax, so the file needs a .mjs extension, or add "type": "module" to package.json:
import OpenAI from 'openai';

const client = new OpenAI({
  apiKey: process.env.AICENTOS_API_KEY,
  baseURL: 'https://aicentos.com/v1',
});

const resp = await client.chat.completions.create({
  model: 'gemini-3.8-flash',
  messages: [{ role: 'user', content: 'Introduce yourself in one sentence' }],
});

console.log(resp.choices[0].message.content);
Popular clients
- Claude Code setup — one-click import with CC Switch or manual configuration
- Codex setup — graphical configuration or hand-written config.toml
- Cursor setup — custom OpenAI-compatible settings
- Cherry Studio setup — add an OpenAI-compatible provider
Top-up
When the sign-up credit runs out, go to Wallet in the left sidebar of the console to top up:
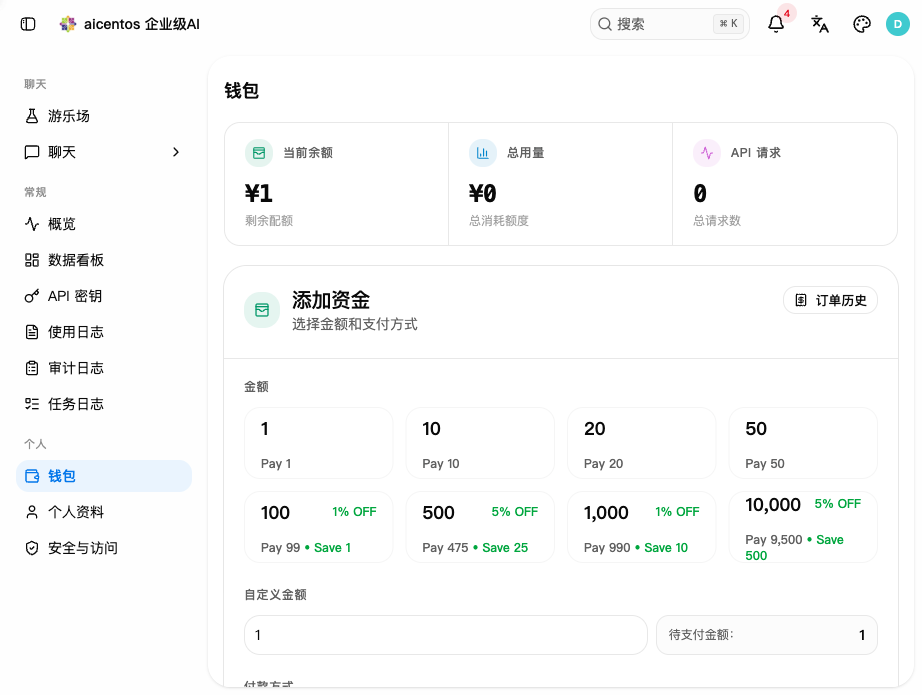
Top-up tiers and discounts (discounts start at ¥100 — you pay less than the top-up amount):
| Top-up amount | Discount | You pay |
|---|---|---|
| ¥1 / ¥10 / ¥20 / ¥50 | None | Full price |
| ¥100 | 1% OFF | ¥99 |
| ¥500 | 2% OFF | ¥490 |
| ¥1,000 | 3% OFF | ¥970 |
| ¥10,000 | 5% OFF | ¥9,500 |
You can also enter a custom amount or redeem a code for credit.
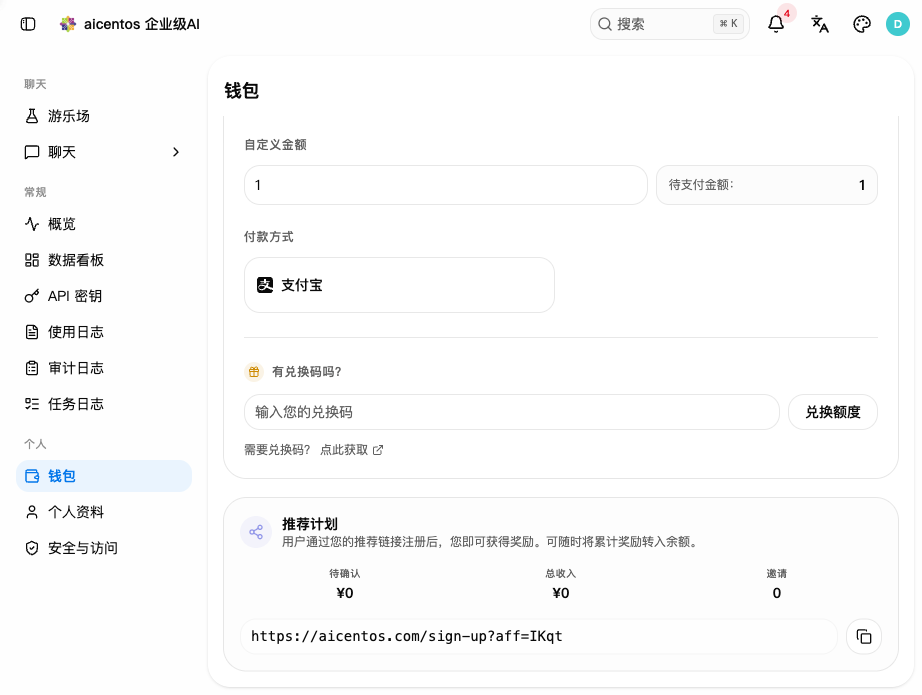
- Payment methods: Alipay, WeChat Pay, bank transfer
- Credit never expires; you are billed for actual token consumption
- Referral rewards: when someone signs up through your invite link, both of you earn rewards that can be transferred to your balance at any time
View usage
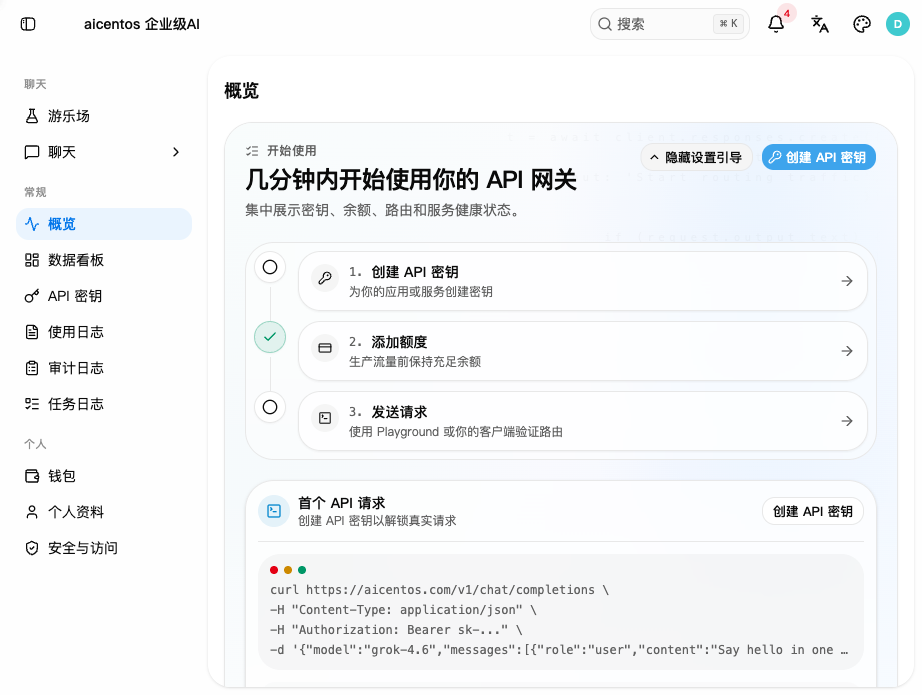
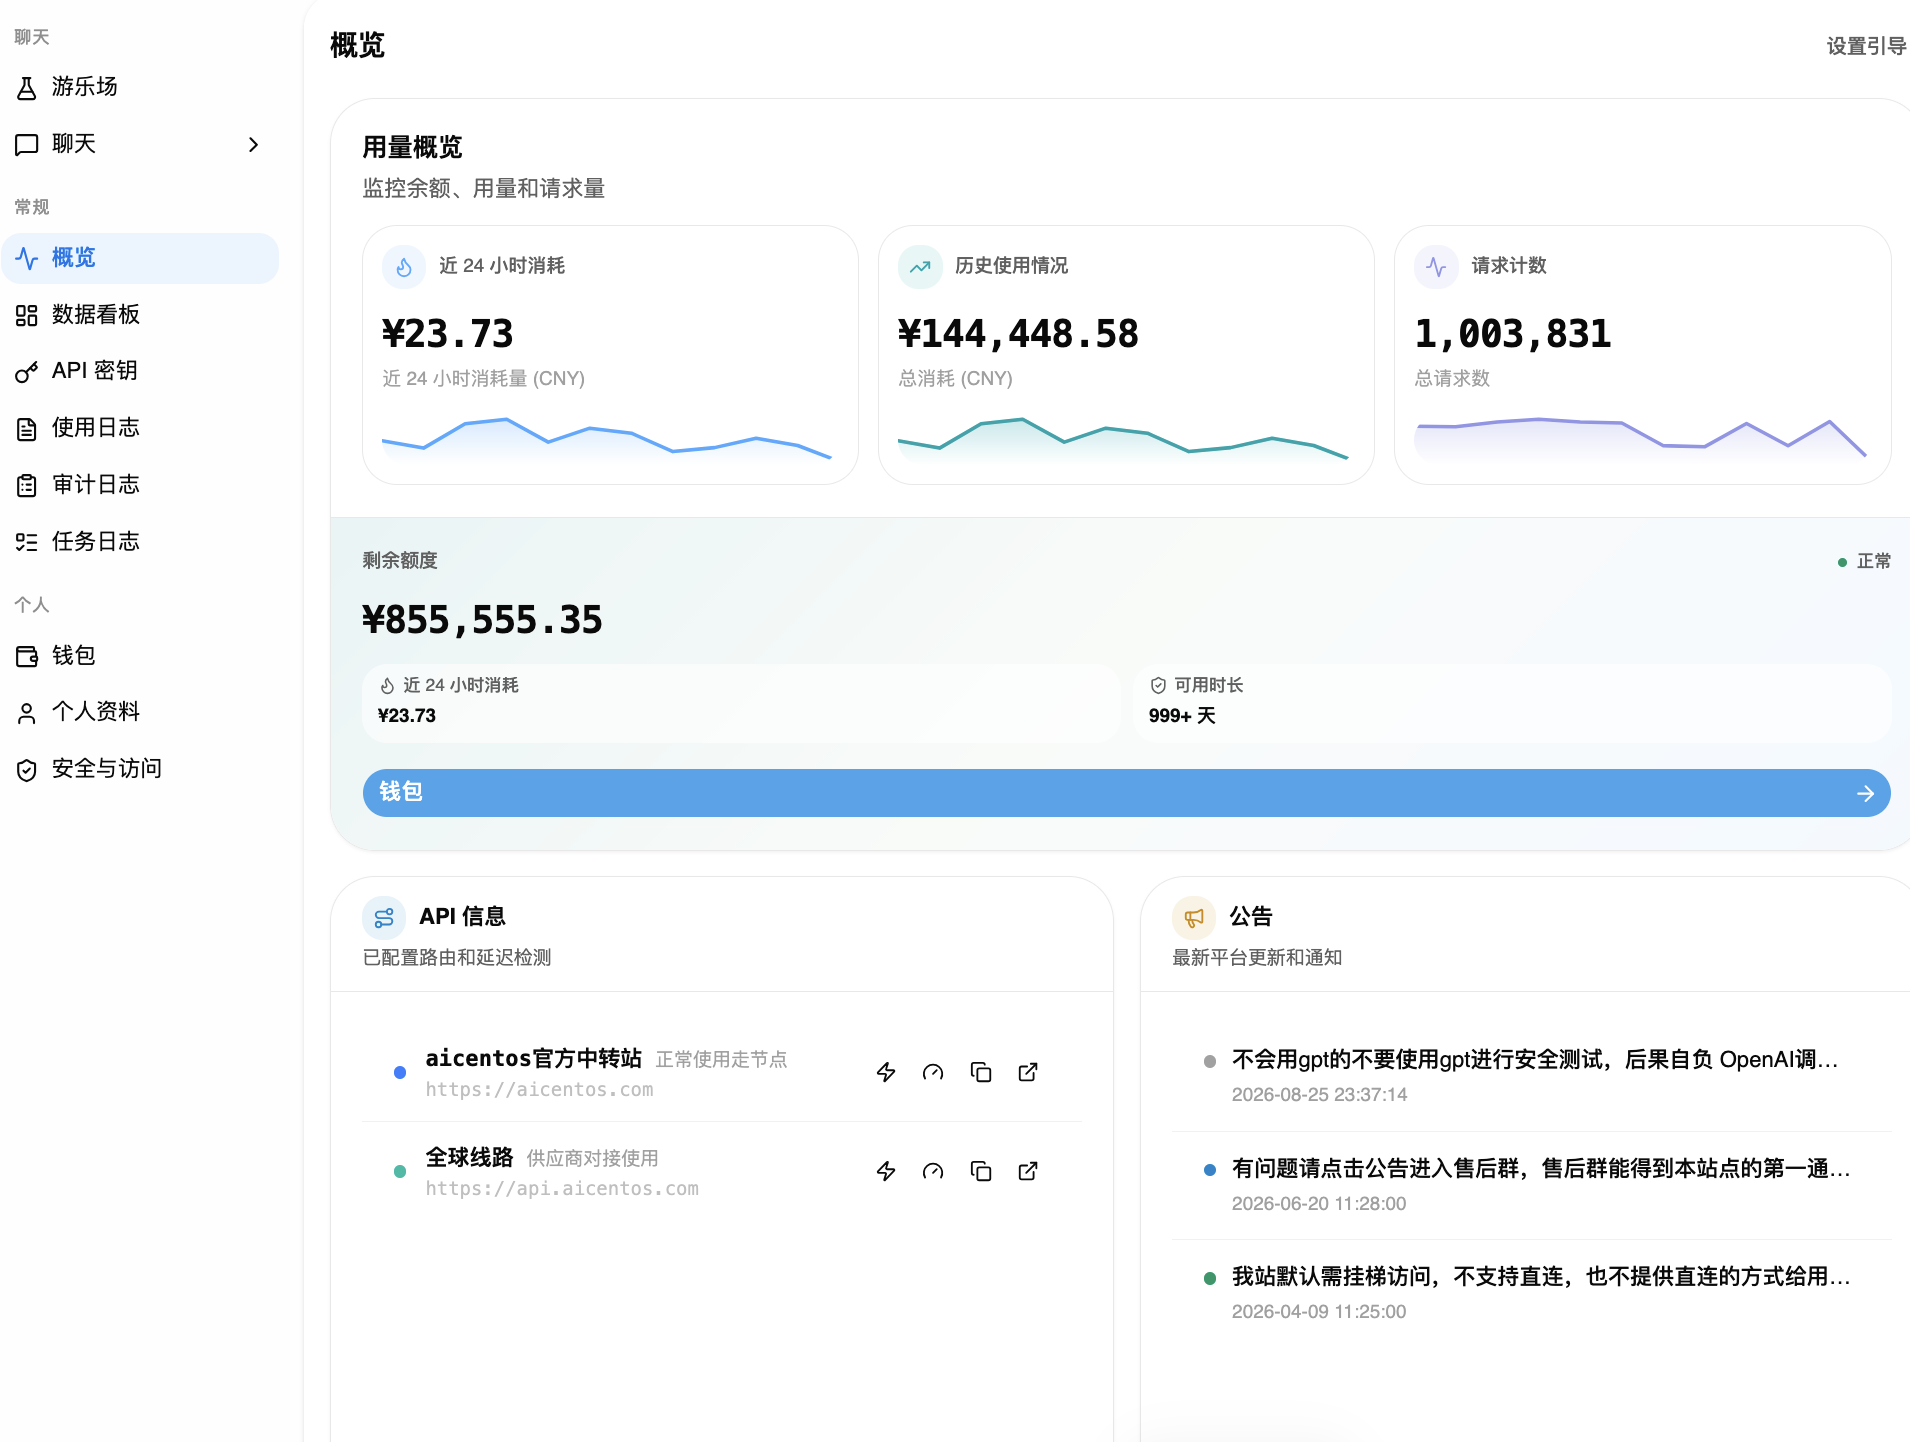
Open Dashboard in the left sidebar of the console to see consumption details:
You can see the current balance, total usage, API request count, and per-model call trends:
Try it without writing code
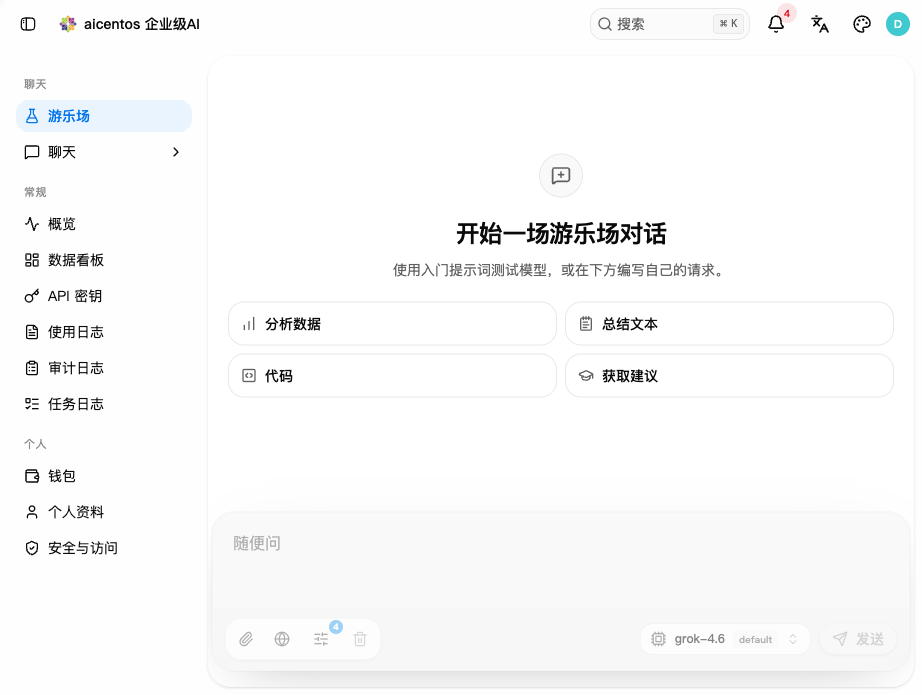
The Chat tab at the top of the console has a built-in playground — pick a model, send messages, and refine your prompt as you chat:
Next steps
- Test models in your browser with the Playground — no code needed
- Browse supported models — see which LLMs are available
- Read error handling — troubleshoot 401s, insufficient balance and more
- Learn about billing — pay-as-you-go billing and balance alerts