 aicentos
Claude Code
Install Claude Code from scratch and connect it to aicentos — Node.js environment, Windows / Mac installation, environment variables and CC Switch configuration, plus a mobile Termux tutorial
Last updated:
Claude Code is compatible with the Anthropic protocol. Just point the Base URL at aicentos and fill in your API Key to use every Claude model aicentos offers.
Step 1: Install Claude Code
Install the Node.js environment
Go to the Node.js website and download the latest LTS version. Make sure to pick the installer that matches your operating system.
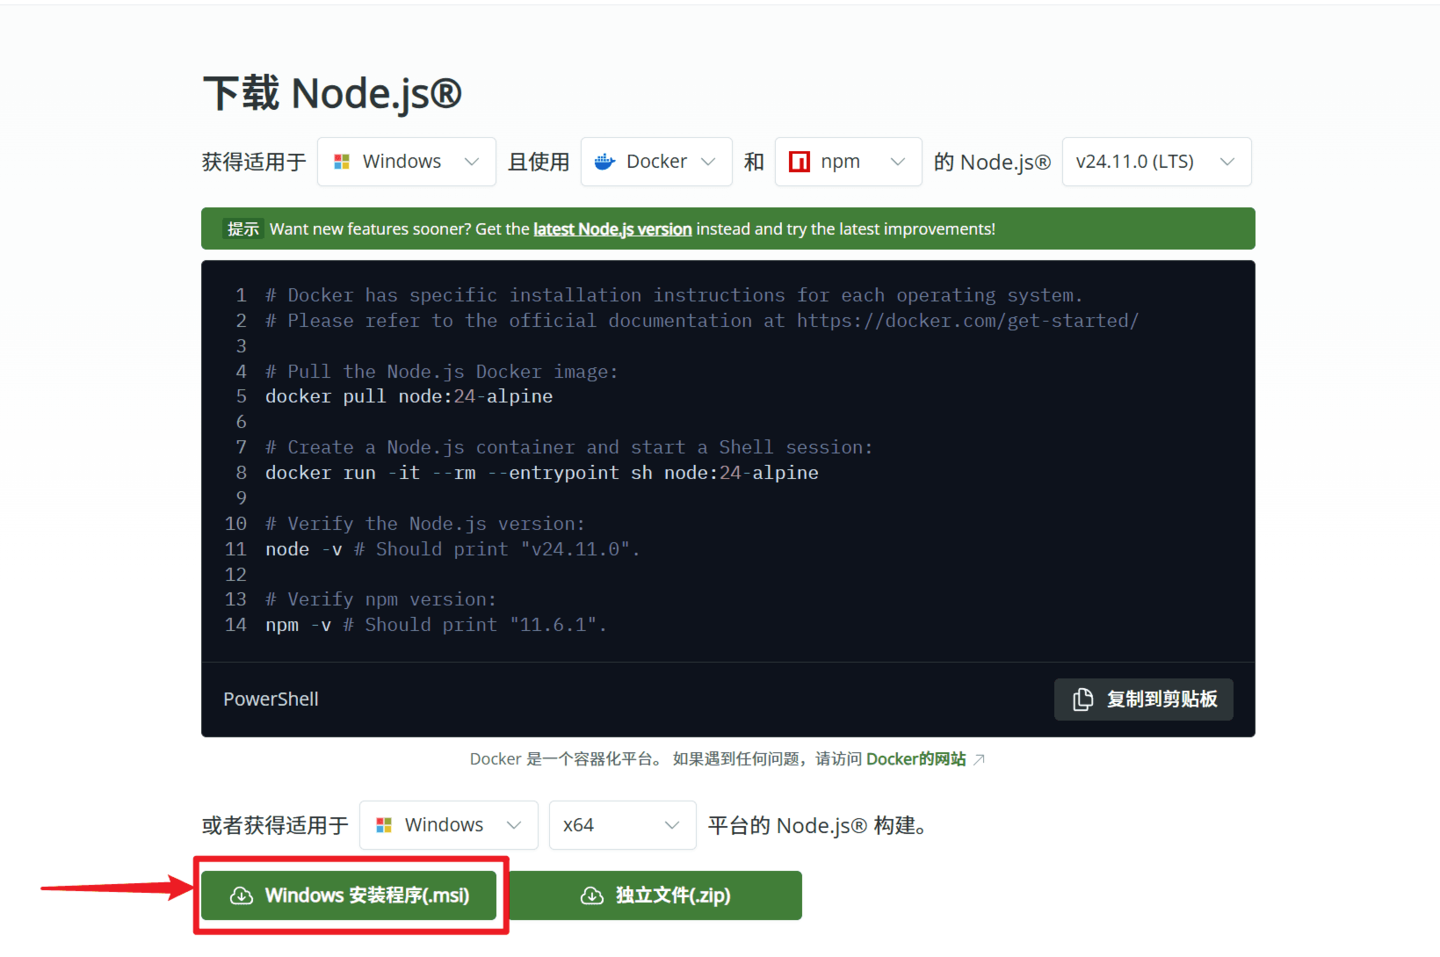
After the installation finishes, open a terminal (use git bash or cmd on Windows) and enter:
node -vIf you see a version number, the installation succeeded.
Install Claude Code
Before installing, make sure the Node.js environment above is set up.
Windows: press Win + R, type cmd and hit Enter to open a terminal, then run:
npm install -g @anthropic-ai/claude-codeMac / Linux: run the following in a terminal:
npm install -g @anthropic-ai/claude-codeOr use the officially recommended curl script:
curl -fsSL https://claude.ai/install.sh | bashOnce installed, test whether it works:
claude --versionIf a version number shows up, the installation succeeded.
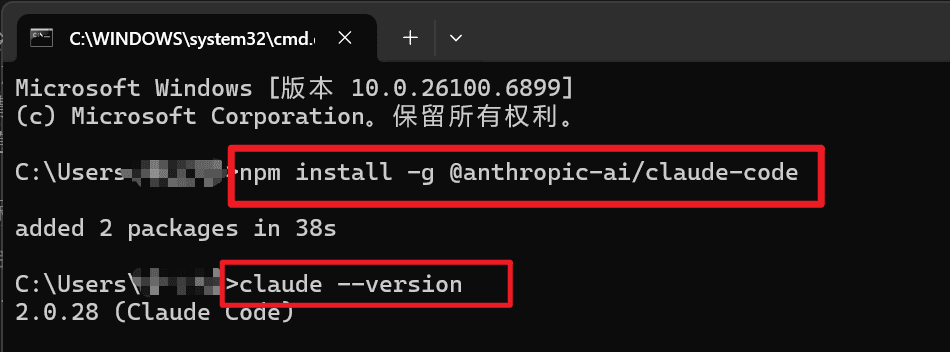
Step 2: Get an API key
Go to the aicentos website console to create your API key.
For detailed key creation steps, see Quickstart.
Step 3: Configure the connection
Two options are provided below: manage everything with CC Switch (recommended), or configure it manually.
Option 1: Use CC Switch (recommended)
If you frequently switch between multiple Providers or CLI tools, CC Switch lets you manage configurations centrally without editing environment variables over and over.
Option 2: Manual configuration
If you would rather not install an extra tool, just set the environment variables. Pick one of the three options below.
Temporary (current terminal session)
Good for quick tests; only effective in the current terminal window:
export ANTHROPIC_BASE_URL="https://aicentos.com"
export ANTHROPIC_AUTH_TOKEN="sk-your-API-Key"
export CLAUDE_CODE_DISABLE_NONESSENTIAL_TRAFFIC=1
claude
If your version does not recognize ANTHROPIC_AUTH_TOKEN, use this instead:
export ANTHROPIC_API_KEY="sk-your-API-Key"Persistent (config file, recommended for the manual route)
Edit ~/.claude/settings.json and add:
{
  "env": {
    "ANTHROPIC_BASE_URL": "https://aicentos.com",
    "ANTHROPIC_AUTH_TOKEN": "sk-your-API-Key",
    "CLAUDE_CODE_DISABLE_NONESSENTIAL_TRAFFIC": "1",
    "CLAUDE_CODE_ATTRIBUTION_HEADER": "0"
  }
}
On Windows you can also open System Environment Variables and, under User variables, click New to create the following two variables:
| Variable | Value |
|---|---|
ANTHROPIC_BASE_URL | https://aicentos.com |
ANTHROPIC_AUTH_TOKEN | The key created in Step 2 |
Restart Claude Code after saving for the change to take effect.
Shell configuration (global)
Add the environment variables to ~/.zshrc or ~/.bashrc:
nano ~/.zshrcAppend the following at the end of the file:
# aicentos API Key (the key created in Step 2)
export ANTHROPIC_AUTH_TOKEN="your-api-key"

# aicentos Base URL
export ANTHROPIC_BASE_URL="https://aicentos.com"
Save and exit, then run source ~/.zshrc (or reopen the terminal) for it to take effect.
Step 4: Run Claude Code
Go to your project directory and start it:
cd /path/to/your/project
claude
Specifying a model
Use --model at launch to pick a specific model:
claude --model claude-opus-4-7Model names follow those listed in the Model Gallery of the aicentos console; see Supported models.
Common commands
| Command | Purpose |
|---|---|
/add-dir | Add an extra working directory |
/resume | Go back to a previous conversation |
/clear | Clear the conversation history |
/compact [instructions] | Compact the conversation, optionally with focus instructions |
/config | View / modify configuration |
/cost | Show token usage statistics |
/doctor | Check the health of the Claude Code installation |
/help | Get usage help |
/init | Initialize the project with a CLAUDE.md guide |
/login | Switch Anthropic accounts |
/logout | Sign out of the Anthropic account |
/mcp | Manage MCP server connections and OAuth authentication |
/memory | Edit CLAUDE.md memory files |
/model | Select or change the AI model |
/permissions | View or update permissions |
/pr_comments | View pull request comments |
/review | Request a code review |
/status | View account and system status |
/terminal-setup | Install the Shift+Enter key binding (iTerm2 and VSCode only) |
/vim | Enter vim mode, toggling between insert and command modes |
Running on a phone (Termux + Ubuntu)
For moments like "no computer at hand, a bug to fix on the go, or a commute that could use some vibe coding". No root and no flashing required — everything happens inside Termux. The whole setup takes 10-20 minutes depending on your network speed.
What you'll get
- A full Ubuntu environment running on your phone (no impact on the system, barely takes any space)
- The full Claude Code command-line tool (identical to the desktop version)
- Low-cost access through aicentos, switching between Opus / Sonnet / Haiku in seconds
Prerequisites
Only two things are needed:
- An Android phone (iOS cannot install Termux, so this tutorial does not apply)
- A aicentos account + API Key (top up the wallet →, create a Key →)
Do not install Termux from Google Play — that version is outdated and unmaintained, and the scripts below will fail to install. Get the latest release from F-Droid or the Termux GitHub Releases.
Step 1: Install the tmoe-linux one-line script
Open Termux, wait for the command prompt (a line with ~ $), then copy the following line in whole and press Enter:
. <(curl -L l.tmoe.me)This mirror is intended for mainland China; users elsewhere should use . <(curl -L git.io/linux.sh).
When it finishes, a graphical menu pops up, like this:
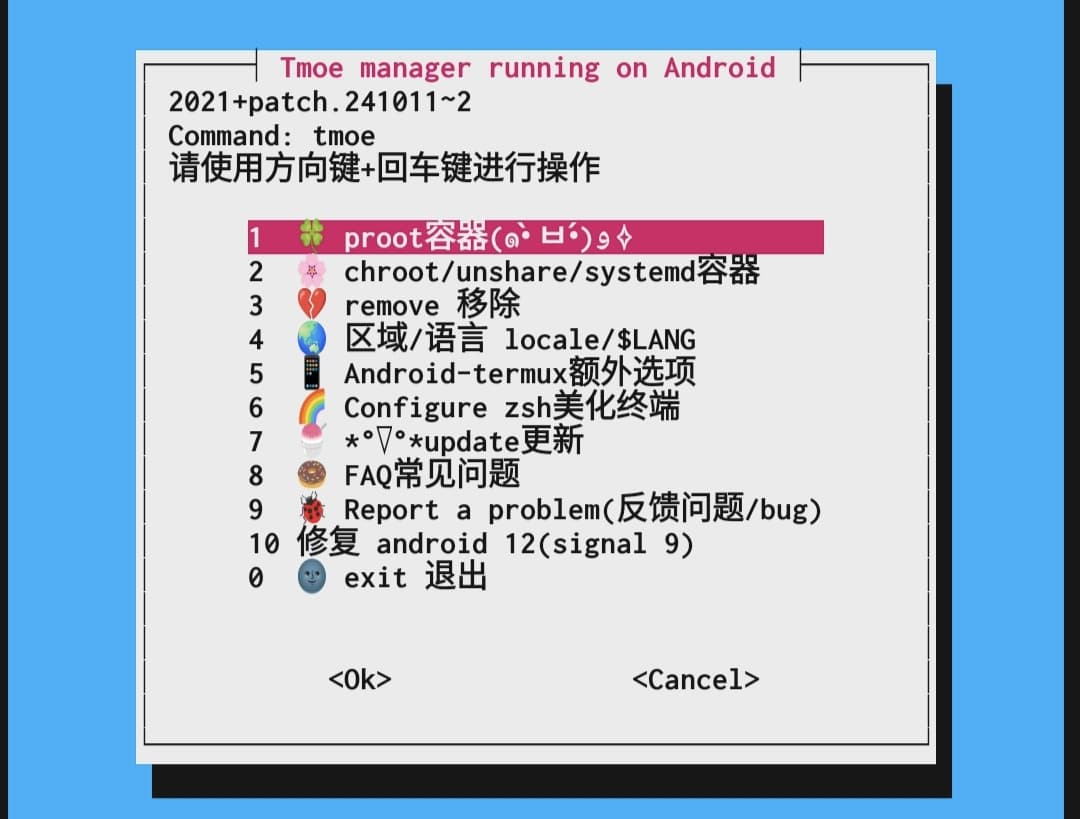
Use the volume keys to move up and down and Enter to confirm (or just tap the screen).
Step 2: Install the Ubuntu container
In the tmoe menu, keep choosing 安装 Linux 发行版 / Install GNU/Linux container until you reach the distro list:
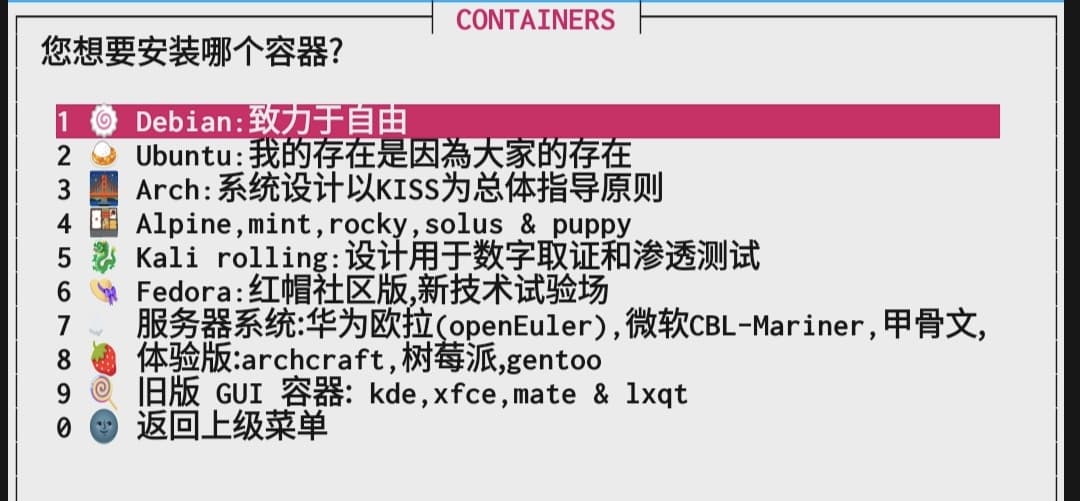
Ubuntu is strongly recommended (best compatibility, the most apt documentation, and the easiest to search for solutions). Pick the latest LTS (e.g. 22.04 / 24.04).
Download + extraction takes a few minutes depending on your network speed — just wait.
Step 3: Enter the container and learn "where you are"
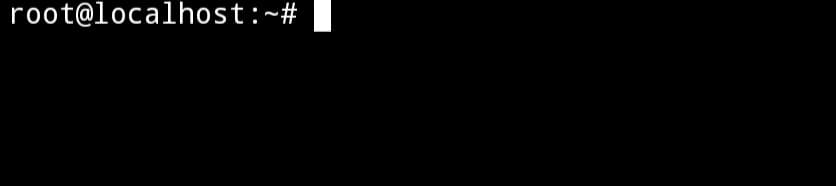
After installation you will most likely be dropped into the container automatically. This is where beginners get lost most easily, so here is how to tell the difference:
Inside the Ubuntu container (the prompt looks roughly like this):
Still in Termux, not inside (a plainer prompt):
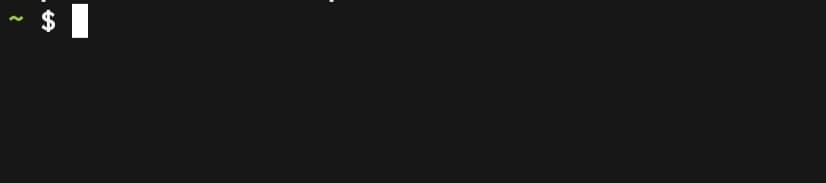
If it is the latter, go back to Termux and enter:
tmoeOpen the menu again and find 启动容器 / Start container to enter.
Remember this rule: installing Node, installing Claude Code, running the claude command — all of this must be done inside the Ubuntu container. Termux's own pkg package system cannot install Claude Code.
Step 4: Install Node.js and Claude Code
Once you have confirmed you are inside the Ubuntu container, run:
# 1. Update the apt package index
apt update

# 2. Install Node.js + npm (the version shipped with Ubuntu is fine)
apt install -y nodejs npm

# 3. Install Claude Code globally
npm install -g @anthropic-ai/claude-code
If npm reports a permission error, prefix the command with sudo. If there is no sudo command at all, you are the root user — just run it directly.
Step 5: Connect Claude Code to aicentos
Claude Code connects to the official endpoint by default, which means two problems for users in mainland China: no quota, and no connection.
We change two environment variables to point it at aicentos:
# 1. Install the nano text editor (may not be present in the container by default)
apt install -y nano

# 2. Edit your shell configuration
nano ~/.bashrc
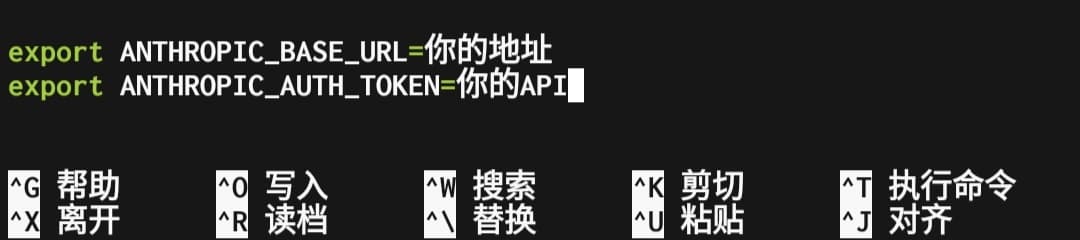
Use the arrow keys to move to the very end of the file, then paste on a new line:
export ANTHROPIC_BASE_URL=https://aicentos.com
export ANTHROPIC_AUTH_TOKEN=your-aicentos-api-key
Replace your-aicentos-api-key with the API Key you created in the aicentos console (usually starting with sk-).
The result looks roughly like this:
Save and exit:
- Press
Ctrl + X(the Ctrl key on your phone's keyboard; Termux shows this virtual key by default) - Press
Ywhen asked to save - Press
Enterto confirm the file name
Make the configuration take effect immediately:
source ~/.bashrcStep 6: Launch
claudeOn first launch you will be asked to choose a sign-in method:
- If you previously signed in with an official account and want to clear it, type
/logoutin Claude Code; once it signs out, startingclaudeagain will use your environment variables - With a fresh install it may skip this and use the environment variables directly
Once you see the Claude Code prompt, you are done — ask it something to try:
Hello, write me a Python hello world scriptQuick command reference on mobile
Inside Claude Code:
| Command | Purpose |
|---|---|
/model | Switch models (Opus / Sonnet / Haiku) |
/logout | Sign out of the current account (needed once after switching environment variables) |
/clear | Clear the current session context |
/help | See all commands |
Ctrl + C | Interrupt the current generation |
Outside the container (in Termux):
| Command | Purpose |
|---|---|
tmoe | Open the tmoe main menu |
| Start container | Choose "Start container" in the tmoe menu |
Common pitfalls on mobile
1. npm install -g stalls or hangs
Likely the network. Inside the container you can first run npm config set registry https://registry.npmmirror.com to switch to the npmmirror registry, then npm install -g @anthropic-ai/claude-code.
2. claude command not found
The path of the command installed by npm install -g is not in PATH. Append the following to the end of ~/.bashrc:
export PATH="$PATH:$(npm config get prefix)/bin"Then source ~/.bashrc.
3. 401 / insufficient balance
Check your aicentos wallet balance, and whether ANTHROPIC_AUTH_TOKEN was copied in full (watch for stray spaces at either end).
4. Want Sonnet instead of burning money on Opus
After entering claude, type /model and pick sonnet. Or add export ANTHROPIC_MODEL=claude-sonnet-5 to .bashrc to pin the default model.
Going further on mobile
- For more comfortable typing: install Termux:Styling to change the font and color scheme
- For a graphical interface: the tmoe menu includes a VNC desktop, so you can run full GNOME/XFCE on the phone
- For long-running background jobs: use
tmuxorscreenso the session survives closing Termux
That's the end of the tutorial. If you run into problems, feel free to report them to the aicentos community.
Notes
- Get the API Key from the "API Keys" page in the console.
ANTHROPIC_AUTH_TOKENandANTHROPIC_API_KEY— pick one, never set both.- The Base URL should be just the root address
https://aicentos.com; do not manually append/v1/messages— Claude Code concatenates it automatically. - After changing the configuration, remember to restart the terminal / restart Claude Code.
- Never commit your API Key to a code repository.